Using the Epilog Laser Cutter
This tutorial introduces you to the Epilog Mini 24 Laser Cutter, the 35 Watt CO2 Laser system at AS220 Labs. The laser cutter can etch and cut into a number of different materials. Organic materials work best but there are a number of plastics and polymers also work well. The following guide will discuss basic setup for running a job on the machine.
For you to get the most out of the guide, it’s best that you are familiar with a few basic concepts on the machine.
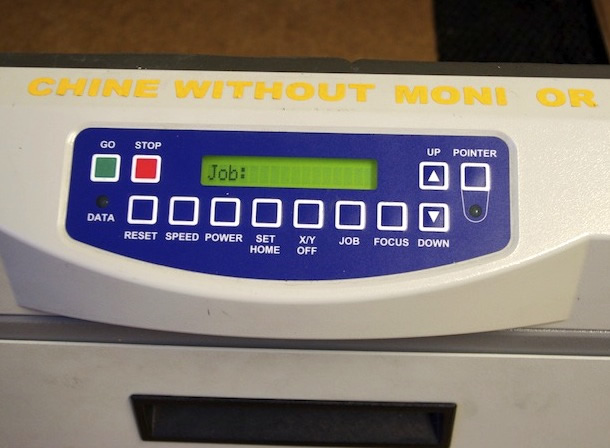
Control Panel - user interface to program settings and adjust machine settings for specific jobs.
I-Beam (Y) and X Carriage - mechanical system that directs the laser beam down onto the material for cutting and/or etching.
II. Starting the Machine
- The power to the machine and the air compressor can be found on the power strip located behind the machine on right.
- Turn on the power strip and both will automatically turn on.
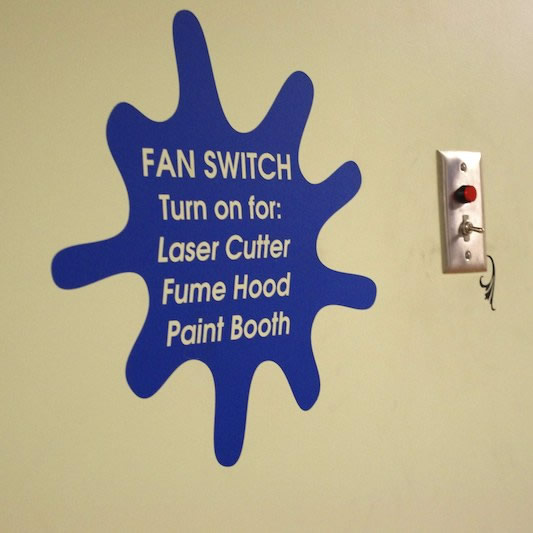
- The exhaust fan must also be turned on, the power switch is located at the entrance of the fab lab on the right ( right next to the big blue sign that says “fan switch” ).
III. Setting Home
- To calibrate the machine for your material and job, you must set the home position on the machine.
- To do so, you must turn on the red laser pointer using the control panel.
- To do this, press the “Pointer” button on the control panel. This will turn on a red laser pointer, indicating where the laser beam is pointing.

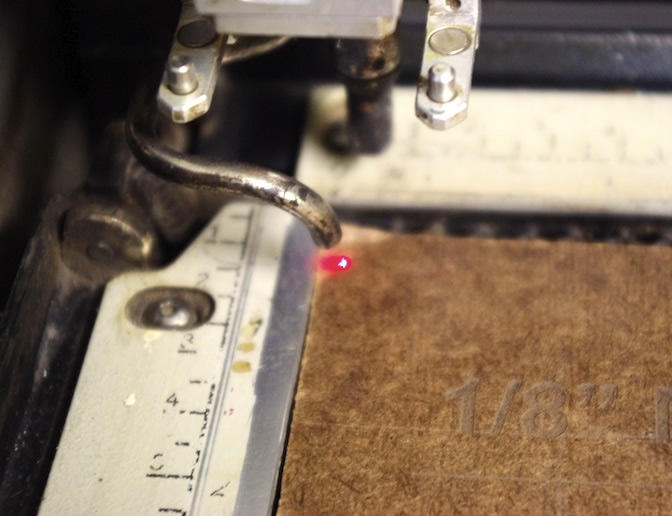
- The dot will appear on your material, and will be your guide when moving the X and Y axis.
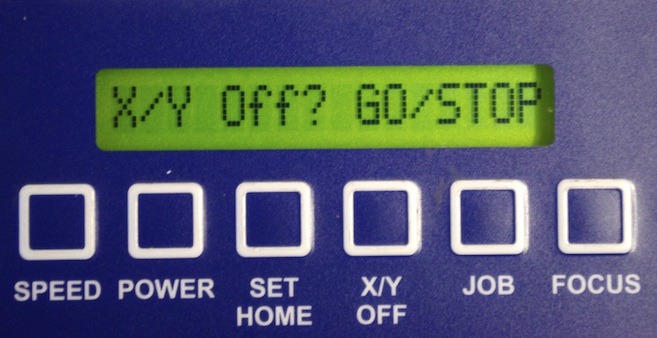
- Next, you must disable the X/Y stepper motors so that you can correctly position home. Do this by pressing the “X/Y” button on the control panel, this will bring up a message on the screen saying, “X/Y Off? GO/STOP”.
- After seeing this screen, press the green “GO” button and the stepper motors will disable and you will be able to move the laser I-beam.
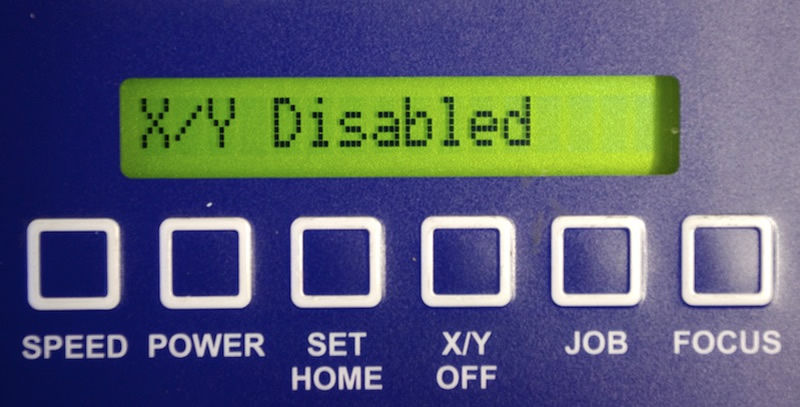
- You will a screen that says, “X/Y Disabled” for confirmation.
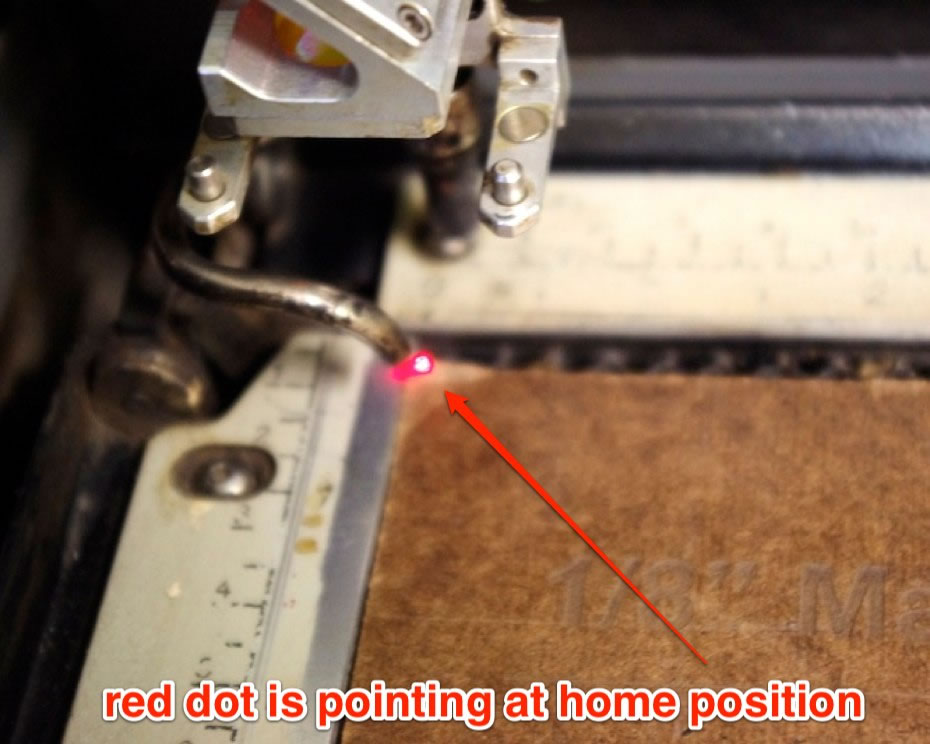
- You’ll want to get the red dot as close to the left corner of your material as possible.
- This will ensure that you job won’t bleed off the edges of your material.
- Once you’ve got the red dot as close as you can get it, set the home by pressing the “Set Home” button on the control panel and the setting will be stored for as long as the machine is running or until you set a new home position.
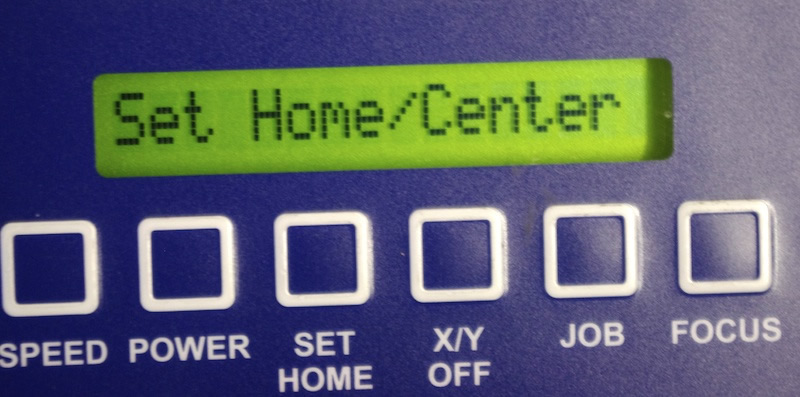
- Once you press the “Set Home” button, you will see a screen on the display that says “Set Home/Center”, this indicates that home position has been set.
- You can now press the “Reset” button to get out of that screen.
IV. Manual Focus
- It is best to manually focus the laser cutter on your material rather than using the autofocus feature, this will provide the best results.
- The cutting bed needs to be raised up or down to be in focus on your material, you will have to use the control panel to make this adjustment.
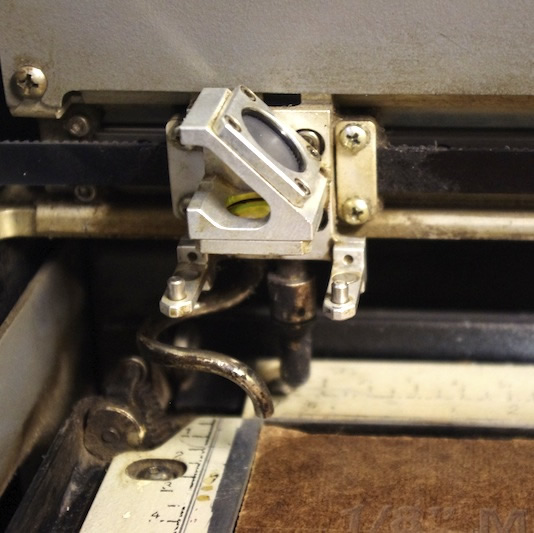
First, take the manual focus tool (metal triangle) and position it on the cutting head so that it’s pointing down towards the material.

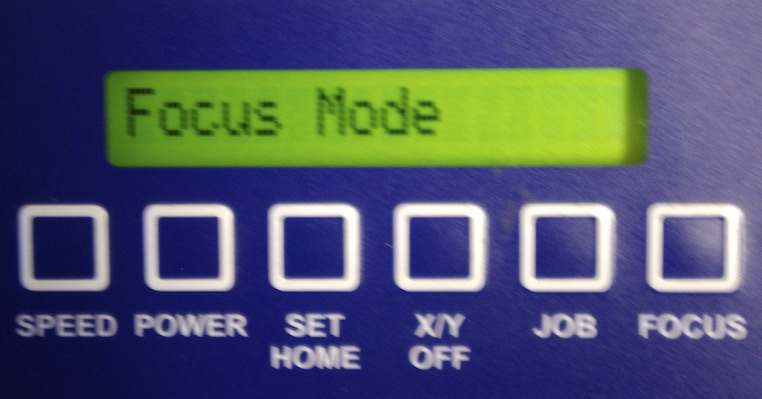
Next, put the machine into focus mode by pressing the “Focus” button on the control panel. This will display “Focus Mode” on the display screen and now the up and down arrow controls will control the height of the bed, adjust them so that the tip of the manual focus tool is touching the material that you are focusing on. It should look similar to the photo above.
Once you have focused the machine, press “Reset” on the control panel you will go back to the default screen on the control panel. You are now ready to send a job from the computer to the laser cutter.
James Rutter contributed to this tutorial.
Laser Cutter Maintenance
Cleaning the X-Axis Linear Encoder
http://www.epiloglaser.com/tl_cleaning_linear_encoder.htm
http://support.epiloglaser.com/article.aspx?cid=8205&aid=11964
Checking Table Level on the Mini and Helix Lasers
http://support.epiloglaser.com/article.aspx?cid=8205&aid=12200
http://support.epiloglaser.com/article.aspx?cid=8205&aid=12501
http://support.epiloglaser.com/article.aspx?cid=8205&aid=11959
Auto Focus Plunger Replacement on the Mini/Helix
http://support.epiloglaser.com/article.aspx?cid=8205&aid=12261
X-Axis Rail Assembly Replacement on the Epilog Mini
http://support.epiloglaser.com/article.aspx?cid=8205&aid=12399
Z-Axis Belt Replacement in the Epilog Mini
http://support.epiloglaser.com/article.aspx?cid=8205&aid=12332
Y-Axis Belt Replacement on the Epilog Mini/Helix/FiberMark
http://support.epiloglaser.com/article.aspx?cid=8205&aid=12497
Aligning the Laser Beam of the Mini and Helix
http://support.epiloglaser.com/article.aspx?cid=8205&aid=12189
X-Axis Belt Replacement on the Mini
http://support.epiloglaser.com/article.aspx?cid=8205&aid=12244
Cleaning Your Optics
http://support.epiloglaser.com/article.aspx?cid=8205&aid=11940
